
User Tools
Table of Contents
Sonoff
Sonoff Basic
Flash guide: https://www.youtube.com/watch?v=fN_QKOWvG1s
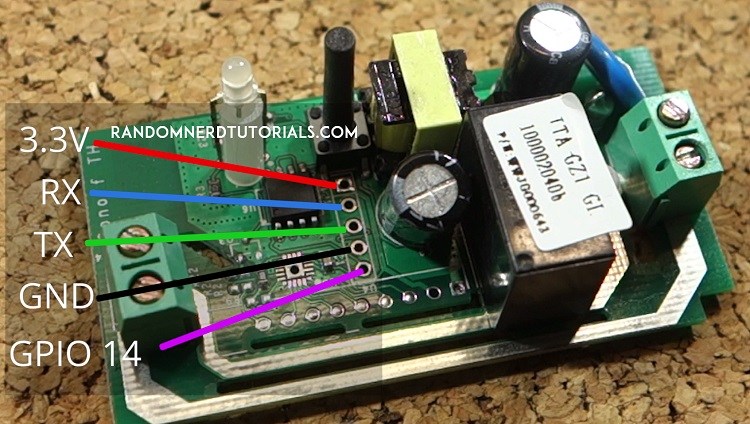
Boot your Sonoff in Flashing Mode
To flash a new firmware to your Sonoff, you have to boot your Sonoff in flashing mode. Follow this 4 step process:
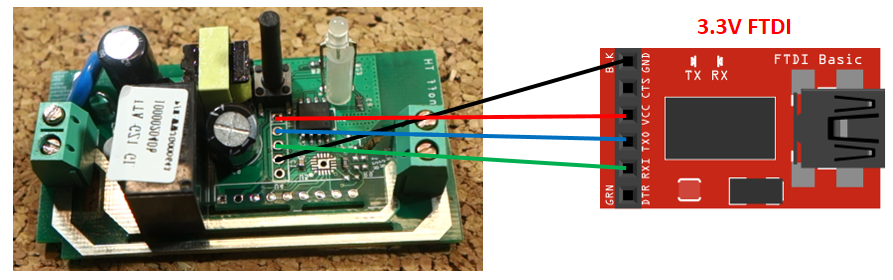
1) Connect your 3.3V FTDI programmer to your computer
2) Hold down the Sonoff button
3) Toggle the switch to apply power to the Sonoff circuit
4) Then, you can release the Sonoff button
Now, your Sonoff should be in flashing mode and you can upload a new firmware.
Sonoff Slampher
You cannot use the button to enter flash mode in the ESP8266 (since it’s a user firmware event that pulls GPIO0 down and no user firmware is running at boot time).
So my solution is to momentarily shortcut to ground the unpopulated pad of R20 that goes to GPIO0 and power the device at the same time. It’s not easy, you will need some practice and you will probably have to do it more than once. But at the end you will have a customized Slampher with fully working RF support.
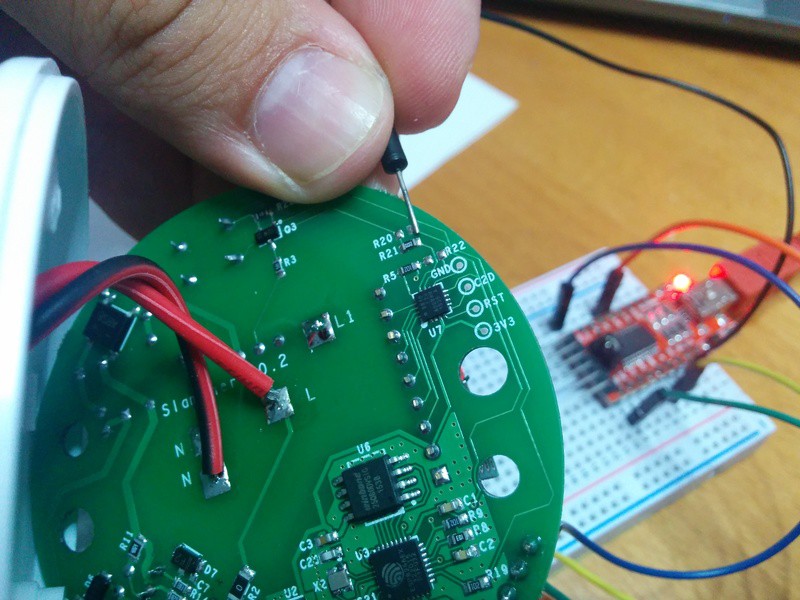
The Slampher has a 4 pins header that brings out everything you need to flash it (except for GPIO0), counting from the little white mark onwards: VCC, RX, TX and GND. You just need to wire your favourite USB to UART board (an FTDI-like) and you are ready to go. Just remember: the ESP8266 requires 3V3, not 5V! And connect TX to your programmer RX and RX to TX. Then you will need to handle the board with care with another ground jumper wire touching the R20 right pad (check the images) while you disconnect and connect you FTDI board or the VCC cable.
